Understanding Individual Form Fields
Info: This article applies to Website Builder purchases made after 14th January 2025. For further assistance, please contact our support team.
In this article you will learn about individual form fields in contact forms.
Getting Started
To get started, you first need to log into the web builder through your Online Control Panel. Unsure how to do so? Follow our guide HERE
After inserting the form, you can add new form fields by clicking the plus button.
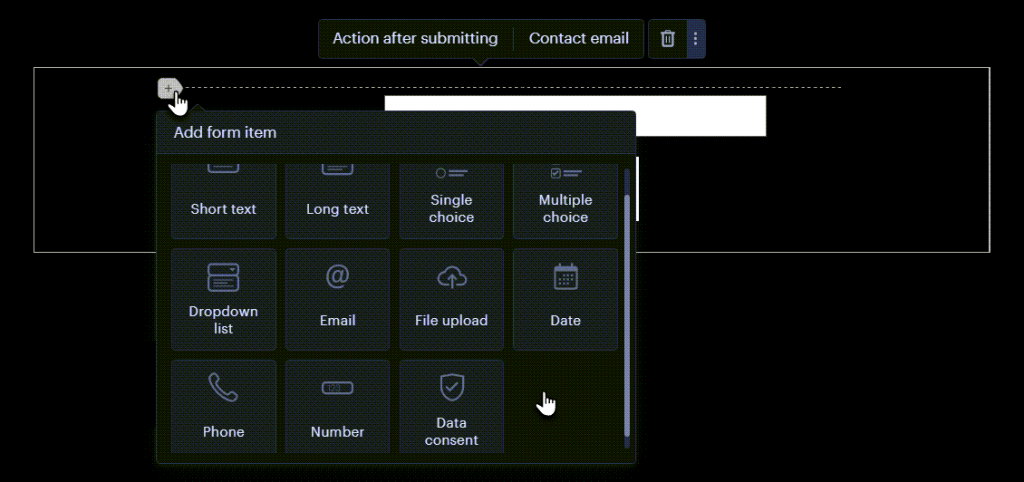
All field types can be marked as mandatory. If a field is mandatory, the sender must complete it before submitting the form. This setting can be enabled using the Properties button for that field.

Field Types
Short Text
The user can enter a short text in this field, such as the sender’s name or address. The label for the field can be customized.

Long Text
The user can enter long text in this field, such as a description of a request or a message from the sender. The field label can be customized.

Single Choice
This field is used to select one option from several choices, such as when selecting one of the services you offer. You can easily edit, delete, or add more options as needed.
Multiple Choice
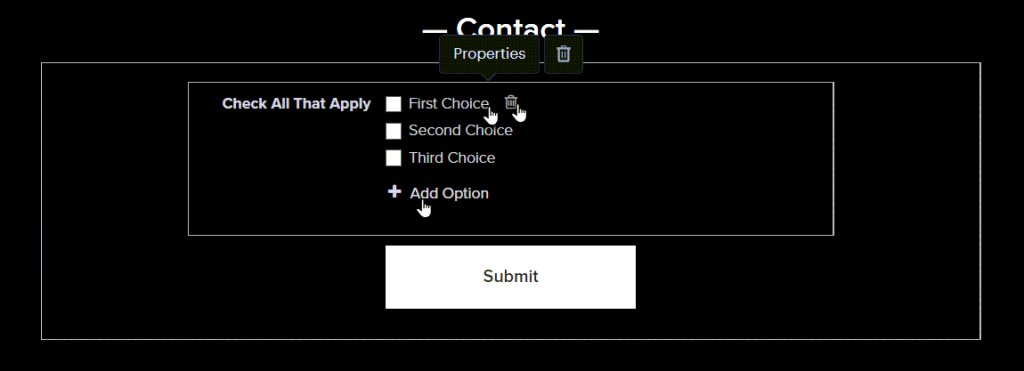
This field allows the sender to check one or more options, such as when selecting a combination of services you offer. You can freely edit, delete, or add more options as needed.

Dropdown List
This field provides a scrollable list of options, from which the user can select only one. It functions as a single-answer field for choosing one of the services you offer.
Click the Edit Options button to configure the options. Each option will appear on its own line in the window.

In this field, the sender can enter their email address. The link is automatically inserted. The field can only be submitted if the email address is in the correct format, including both a username and a domain ending, such as .com or .co.uk.

Upload a File
This field allows the sender to upload their own file. All common formats are supported, with a maximum file size of 4 MB.
Both the label text and the Select File button can be customized.

Date
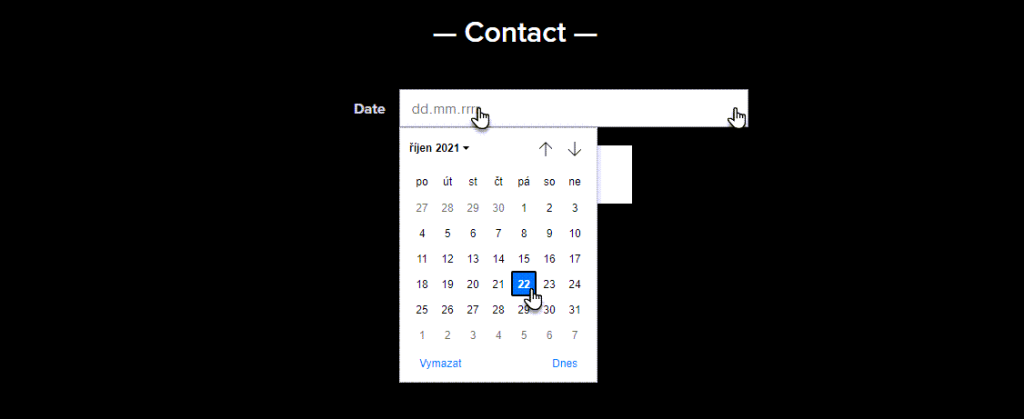
This field allows the sender to set a date. They can either type it in or use the calendar to select a date. It is useful when a specific date is required from the sender, helping to prevent errors or unconventional date formats.
Phone
This field accepts numbers only. If the sender enters letters, the form cannot be submitted. In addition to phone numbers, this field can be used for other types of numeric data.

Number
This field is designed specifically for numeric input; letters or special characters are not allowed. Users can also select a number by clicking the arrow to adjust the value with the mouse.

Data Consent
This field is specifically designed for user consent to process personal data. Only one checkbox can be included. The text can be formatted in bold or italics, and a link can be added (e.g., to a page with a personal data protection document).
To adjust the format or insert a link, click the Edit Text button.
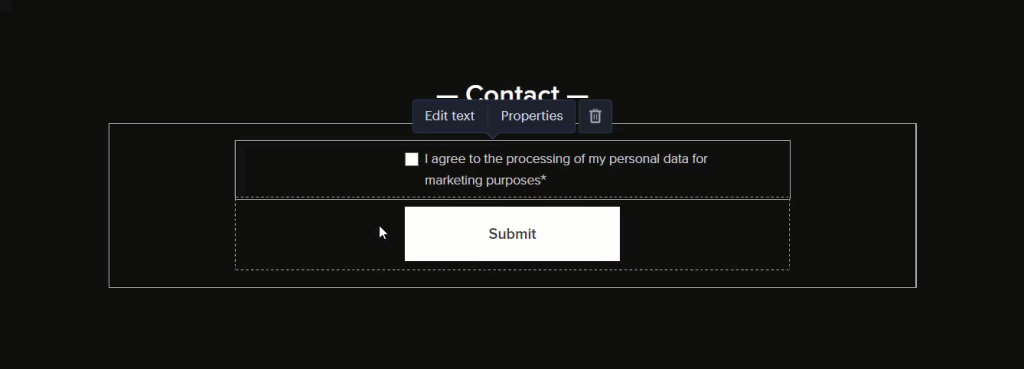
You can delete individual fields by clicking the trash can icon.

IMPORTANT: To delete a specific field, click the trash icon directly in the given field. Avoid clicking the trash can for the entire form, as this may delete the whole form.
If you have any further questions, simply raise a support request from within your Online Control Panel or call us on 0345 363 3637. Our Support team are here to help and ready to assist you with your enquiry.
For assistance raising a support request please follow the following guide.