How to manage databases on Cloud hosting using Vesta control panel
This guide will explain how to create and manage databases for domains on Cloud hosting using Vesta control panel.
For cloud hosting customers using cPanel, please click here for the relevant support guide.
Creating databases:
To add a database within the Vesta control panel, select the ‘DB’ link from the Vesta menu:

Then select the + icon to add a database:

You will then need to complete the following fields:
Database: database name (will be prefixed with admin_)
User: database user-name (will be prefixed with admin_ and should be no longer than 16 characters together with the prefix)
Password: Select ‘generate’ to automatically generate a strong password
Once the required fields are filled out, select ‘add’ to create the database.
Access to Phpmyadmin:
To access Phpmyadmin, go to the ‘DB’ section of the control panel and select the link provided on this page for Phpmyadmin. Then enter your database username and database password to log in.
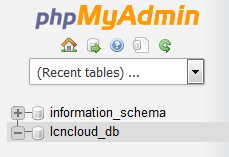
To manage databases in Phpmyadmin, select the database name that you want to manage from the column on the left side of the page:

You can then select from the options in the header area of the page, to import/export, edit, manage or browse the database contents:
