How to install Fail2Ban on a Plesk server
Supported OS: Linux
Installation method: Plesk UI
Step 1
Log in to your Plesk server via https://XXX.XXX.XXX.XXX:8443, replacing the X’s in our example with the IP address of your server.
Step 2
Look for the “Tools & Settings” option and then choose “Updates & Upgrades“.
(Please note that it may take a short while for the page to load).
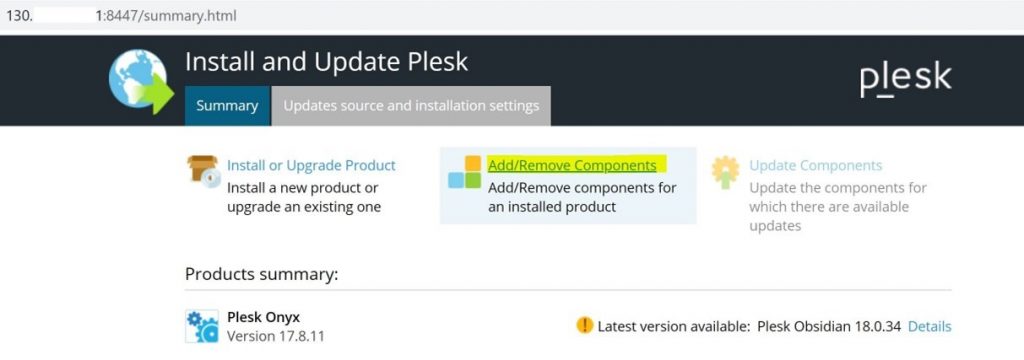
Step 3
Select “Add/Remove Components” as shown in the image below:
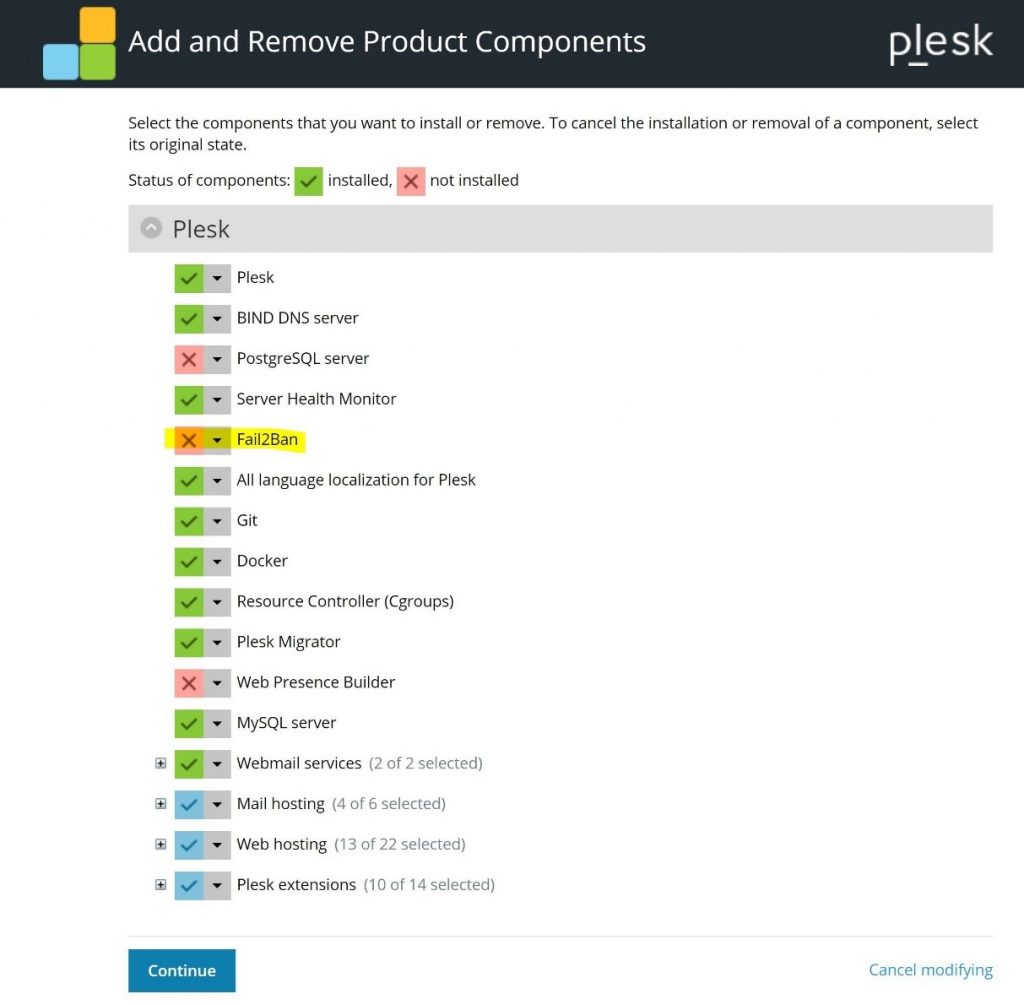
Step 4
Now select ‘Fail2Ban‘ and choose Install as shown here:
Step 5
Click on ‘Continue‘ at the bottom of the page to start the installation.
Step 6
Once the install has completed, you can access Fail2Ban through Plesk > Tools & Settings > Address Banning (Fail2Ban).